

How To Access Color Swatches In Photoshop

Create Custom Photoshop Colour Swatches and Sets
Version annotation: Using Photoshop CC? Please see our fully updated Create Colour Swatches in Photoshop CC 2020 tutorial.
In this Photoshop tutorial, we're going to learn how to collect and organize colors into custom color swatch sets which we tin can then think and use whenever nosotros need them, perfect for times when we're working with multiple clients and each of them has their own specific colors they desire used on their project, or when nosotros simply want to collect and organize different colors for our own piece of work.
One of the things I relish doing is taking photos of outdoor nature scenes, and so sampling some of the colors from the images and saving them as different colour sets. After all, it's hard to top Mother Nature when it comes to finding colors that work well together. In this tutorial, we're going to be doing exactly what I simply described, sampling various colors from a photo, storing them as color swatches in Photoshop's Swatches palette, and and then saving them as a custom swatch set up. We'll also run across how to reset the swatches back to Photoshop's default colors when nosotros're done and so how to load our newly created swatch set up whenever we need it!
Here'southward the photo I'll be using to sample colors from. I desire to create an "Autumn Leaves" color swatch set up, so this photo should work nicely:
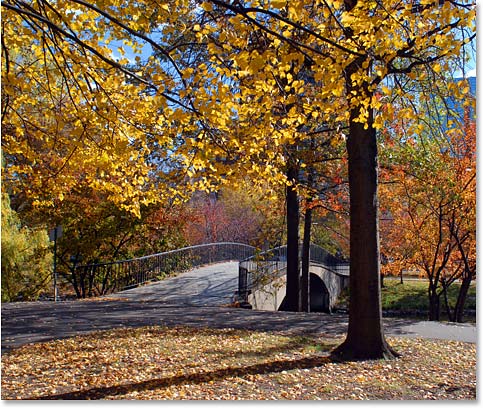
A photo of leaves changing colour in the Fall.
At the end of the tutorial, we'll see an instance of how you lot tin can then use the colors from your custom swatch set to create something entirely dissimilar. Let'south become started.
Pace 1: Delete The Existing Color Swatches From Photoshop' Swatches Palette
To create our custom swatch set, let'south first delete all of the color swatches that are currently in the Swatches palette. Don't worry, they won't be gone for good, equally we'll see a flake after on. Switch over to your Swatches palette, which past default is grouped in with the Color and Styles palettes. Unless you've previously loaded other swatch sets, you'll find Photoshop'south default colour swatches filling up the palette:
Photoshop's Swatches palette showing the default prepare of color swatches.
Unfortunately, Adobe forgot to include a "Articulate All Swatches" option, so in order to delete all the color swatches currently in the Swatches palette, we'll need to delete each one manually. To do that, hold downwards your Alt (Win) / Option (Mac) primal and hover your mouse over the color swatch in the tiptop left corner (the "RGB Crimson" swatch). You'll run across your mouse cursor change into a scissors icon:
Hold down "Alt" (Win) / "Selection" (Mac) and hover your mouse over the red color swatch in the top left corner. Your mouse cursor changes to a pair of scissors icon.
And so, while however belongings down "Alt/Choice", click on the color swatch to delete it, then continue clicking to delete all of the remaining swatches. You'll need to click a total of 122 times to clear all of them, but depending on how fast y'all are at mouse clicking, it shouldn't take too long. Your Swatches palette will be completely empty when you're washed:
The swatches palette is now empty after deleting all the default colour swatches.
Step ii: Select The Eyedropper Tool
Open the prototype in Photoshop that yous want to sample your colors from if it isn't open already, and then grab your Eyedropper Tool from the Tools palette, or press I on your keyboard to select it with the shortcut:
Select the Eyedropper Tool.
Footstep 3: Sample Your Showtime Color From The Prototype
With the Eyedropper Tool selected, motion your mouse cursor over an area of colour you desire to sample, then click to sample it. I'g going to sample a vivid xanthous from i of the leaves in the top of my image every bit my first colour:
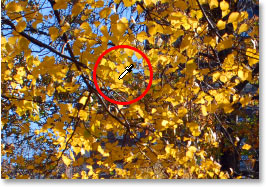
Sampling a bright xanthous from i of the leaves.
You tin see exactly which color you've sampled by looking at the Foreground color swatch in the Tools palette:
The sampled color appears in the Foreground color swatch in Photoshop'due south Tools palette.
Note: Yous may find it easier to sample your colors by holding down your mouse button every bit you elevate your mouse cursor around inside the image (with the Eyedropper Tool selected). The color the Eyedropper is currently over appears in the Foreground colour swatch in the Tools palette and continuously updates as y'all drag your mouse, giving you a live preview of the color earlier yous sample it, which I find much easier than the "click and see what you lot get" method. Release your mouse button when you're over the color you want to sample.
Step iv: Add The Color To The Swatches Palette
Once you've sampled your beginning color, move your mouse cursor into the empty area inside the Swatches palette. Yous'll run across your mouse cursor modify into a paint bucket icon. Click anywhere inside the empty area to convert your sampled colour into a color swatch. Photoshop will pop upward a dialog box request you lot to enter a proper name for your color swatch. If you're creating a swatch fix for a client using specific Pantone colors they've requested, it's a good idea to enter the Pantone color name as the name of your swatch ("Pantone Yellow 012 C", for instance), or if you're creating the swatch set for your own use, use whatever name makes most sense to you. I'm simply going to name my colour "Yellow":
Give your new color swatch a descriptive proper name, although yous tin can choose not to name your colors as well.
You don't necessarily have to name your color swatches, so if the names don't really matter to you, feel complimentary to leave them with the default names that Photoshop gives them. Click OK when you lot're done to go out out of the dialog box, and if I wait now in my Swatches palette, I can run across that my commencement color has been added:
The Swatches palette showing my "Yellow" color added.
Step five: Proceed Sampling Colors And Creating Color Swatches From Them
Continue sampling colors from your image then clicking within any empty expanse in the Swatches palette to save them as colour swatches, naming them if needed. I've sampled ten more colors from my image, giving me a full of eleven color swatches in my Swatches palette. You can have as many colour swatches as you like:
More sampled colors have been added to the Swatches palette as colour swatches.
Step half-dozen: Save The Color Swatches As A Swatch Set
When you're done calculation colors to the Swatches palette and you're set to salvage them equally a new swatch set, click on the pocket-size right-pointing arrow in the top right corner of the Swatches palette to access the palette menu:
Admission the Swatches palette menu past clicking on the minor right-pointing arrow.
Then select Save Swatches from the menu that appears:
Select the "Salvage Swatches..." choice.
Photoshop volition pop upwards the Save dialog box. Enter a name for your new swatch set. I'm going to name mine "Autumn Leaves":

Enter a proper name for your new swatch set.
Click the Save button when you're done to relieve the new set. Photoshop saves the swatch prepare in the same default directory as all the other swatch sets that were installed with Photoshop, then you won't have to go looking all over your computer the side by side fourth dimension you want to access whatever of the custom sets you've created, every bit nosotros'll meet in a moment.
Step vii: Reset Your Swatches Back To The Defaults
We've sampled some colors from an image, created color swatches from the sampled colors, and saved them all as a new custom swatch set. But what if we want to go dorsum to using all those default swatches we deleted? All we need to do is click one time again on the small right-pointing arrow at the peak of the Swatches palette to bring the palette card support, and this fourth dimension, we choose Reset Swatches from the list:
Select "Reset Swatches" from the palette carte to revert back to Photoshop'due south default color swatch set.
Photoshop will ask you if you want to replace your current swatches with the defaults. Yous have a choice here of clicking "OK", which tells Photoshop to remove your current swatches and supercede them with the defaults, or you can besides click "Append", in which instance you'll keep your existing swatches and Photoshop volition simply add together the default swatches to them. I'm going to click OK to supersede my "Fall Leaves" swatches with the defaults:
Clicking OK to reset my colour swatches to Photoshop'south defaults.
And now my Swatches palette is filled one time over again with the default colors:
The default color swatches have returned.
We'll see how to admission our custom color swatches set, as well as how to use it, side by side.
Step viii: Load The Custom Colour Swatch Prepare
The side by side time yous want to utilise your custom color swatch set, all y'all need to do is click again on the right-pointing arrow at the peak of the Swatches palette to access the palette carte. If y'all look down at the bottom of the menu, yous'll run into a listing of additional color swatch sets that are available. Most of these are additional sets that installed with Photoshop, but since Photoshop saves our custom swatch sets in the same directory as the other sets it comes with, you'll notice your custom sets listed hither also. All you need to do is click on the name of your custom prepare to select it. Photoshop lists the names of the sets in alphabetical social club, so my "Autumn Leaves" set is listed second from the top:
Y'all'll find all your custom swatch sets listed forth with the other sets that install with Photoshop in the Swatches palette menu. Click on the name of the ready to select it.
Again, Photoshop will ask you lot if yous want to supplant your existing swatches with the new ones or if you simply want to append them to the listing. I'm going to click OK to replace the default swatches with my Autumn Leaves swatches:
Click "Replace" to replace the current swatches in the Swatches palette with your new swatches.
And just like that, my custom "Autumn Leaves" swatches are loaded into my Swatches palette for me, set to use:
The custom swatch fix is loaded back into the Swatches palette.
Choosing A New Foreground Color From The Swatches Palette
The corking thing virtually using color swatches is that they're essentially preset colors, meaning colors that we've already chosen (or colors that Adobe has already chosen if nosotros're working with swatch sets that installed with Photoshop), which means nosotros don't have to keep choosing them with Photoshop'southward Color Picker every time we need them. To select any of the colors in the Swatches palette, simply hover your mouse over the color swatch. You'll run into your mouse cursor alter into the Eyedropper icon. Then click on the color to select it. Hither, I'm choosing the orange color, second from the left:
Click on any colors in the Swatches palette to instantly select them.
After clicking on it, I tin encounter past looking at the Foreground color swatch in the Tools palette that the colour I simply clicked on has indeed been selected:
The color you clicked on in the Swatches palette appears in the Foreground color swatch in the Tools palette.
Choosing A New Groundwork Color From The Swatches Palette
To select a color to use as your Background colour, simply hold down your Ctrl (Win) / Command (Mac) key and click on the color you want in the Swatches palette. Here, I'grand clicking on a dark ruby color while holding downwardly "Ctrl/Command":
Hold down "Ctrl" (Win) / "Command" (Mac) and click on any color in the Swatches palette to select a color to use as your Groundwork color.
Now if I look again in my Tools palette, I can see that the Groundwork colour swatch is filled with the dark red color I only clicked on:
The Background color swatch in the Tools palette now appears filled with the colour you selected in the Swatches palette.
I can now use the colors from my "Autumn Leaves" swatch set whenever I want, notwithstanding I want! Here I've created a simple design for a poem using the colors from my swatch set up, forth with the "Scattered Maple Leaves" brush that ships with Photoshop:

A design for a poem using the colors from my custom "Autumn Leaves" swatch prepare.
Other Stuff
© 2022 Photoshop Essentials.com.
For inspiration, not duplication.
Site design past Steve Patterson.
Photoshop is a trademark of Adobe Systems Inc.
Source: https://www.photoshopessentials.com/basics/custom-swatches/
Posted by: weirthill1936.blogspot.com
0 Response to "How To Access Color Swatches In Photoshop"
Post a Comment